VRCC Just Pics Tutorial
How to upload your pics!
First, point a new browser window to the new Just Pics photo album. From there we will take you step by step through the process of uploading photos into your personal album in Just Pics. In this tutorial we will assume that you have registered a new account in Just Pics and have your login information handy. We will also assume that you have previously created an album to place your photos. If you have skipped one of these steps you should start at the Tutorial Index and read the appropriate tutorials.
Important things to know
- You must register an account in the Photo Gallery to add albums or photos
- You must login with your new account to add albums or photos
- You must create an album(or already have one) before you can add pictures
Let's Get Started!
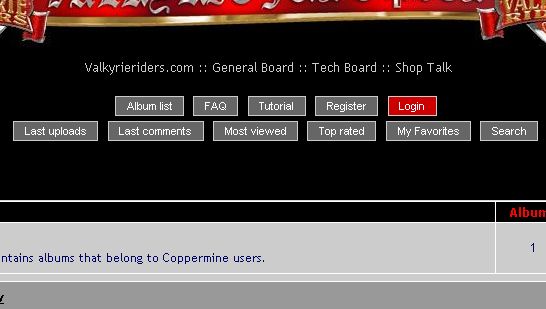
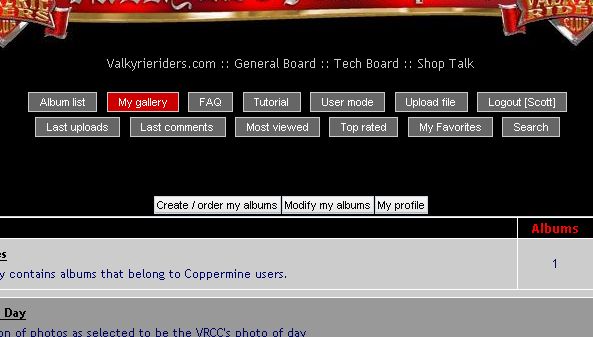
Step 1: Click on the Login link as seen in the above illustration(highlighted in red) If you are already logged in, skip to step 3.
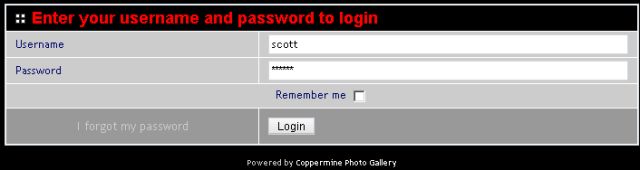
Step 2: Enter the name and password that you provided when registering and click the Login button.
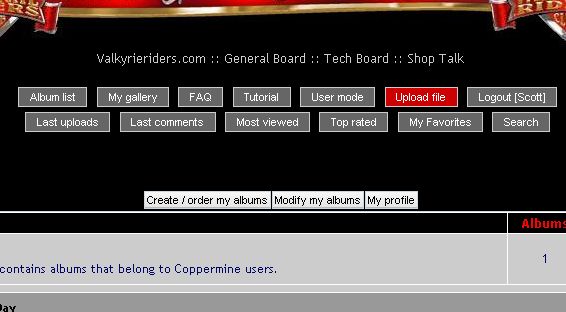
Step 3: Click on the Upload File link as seen in the above illustration(highlighted in red)
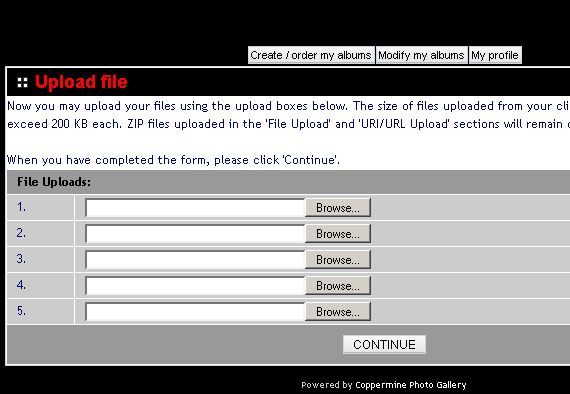
Step 4: You will now be greeted with a list of 5 upload boxes. You can upload 5 photos at a time if you choose, but lets just start with one. Click the first Browse button to select a photo for upload.
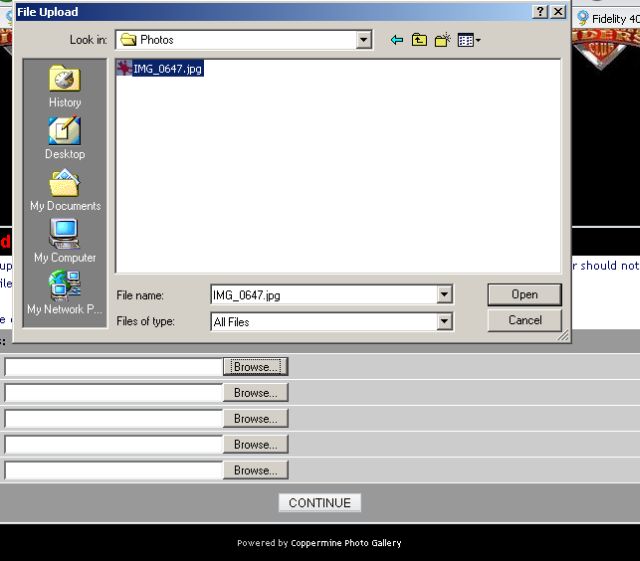
Step 5: Navigate to the pic you want to upload in the dialog.
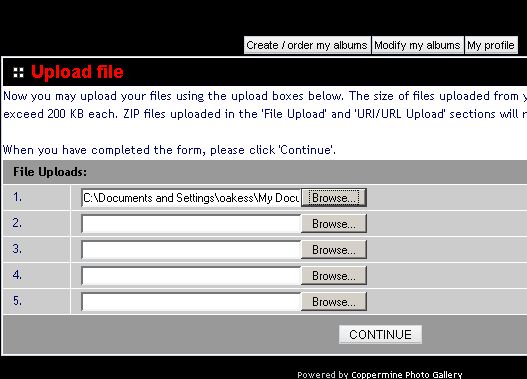
Step 6: Once you have your photos(s) selected, click the Continue button to upload your photos.
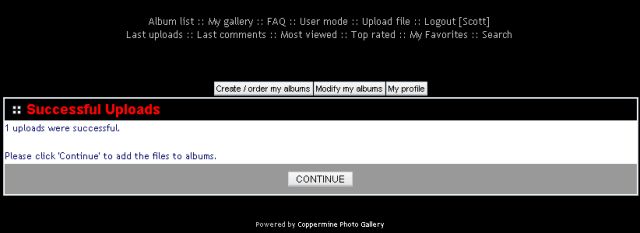
Step 7: If your photo met the requirements for file size(less than 200kb) you should get the upload confirmation above. Click Continue to go to the next step.
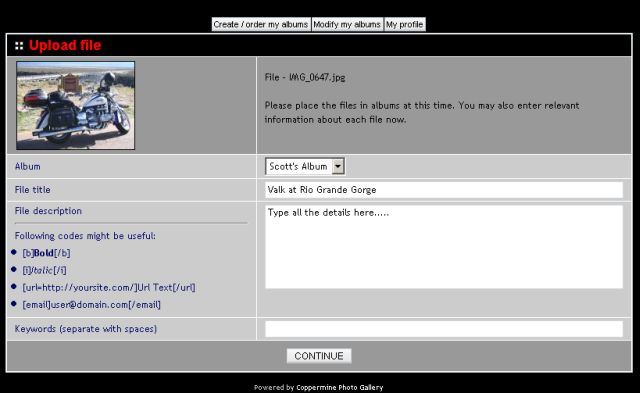
Step 8: This step is where you select the album to place the photo(if you have more than one), select a title, and a description of the photo. Keywords are used in the search function, so use them if you want. Once you are satisfied with the details, click continue to add your photo to the album you selected.

Step 9: You should then get this message if your photo was successfully added. Click Continue to go back to the main album view.
Step 10: Now you can navigate to your album. Your album will be listed under USER ALBUMS. Follow the links until you get to your album to see your newly added photo.
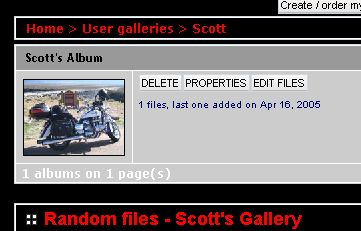
Step 11: WARNING: In the view above we are looking at the ALBUM thumbnail. If you click the delete button it will delete the WHOLE ALBUM not just the photo you see. The other buttons can be used to administer your album and photos.
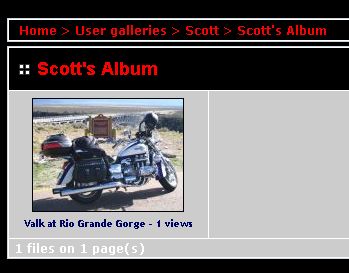
Step 12: Here we are, the thumbnail view of our newly added photo!
If things didn't go quite like they were supposed to, and you are SURE you followed the instuctions exactly then send us an email and we'll give you a hand. supportstaff@f6rider.com
Back to Tutorial Home